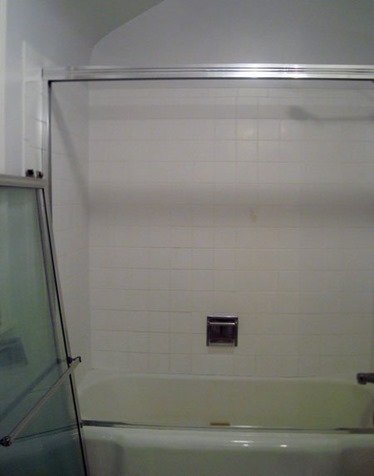
Perhaps feeling too cocky after the sink repair, I took on another project. For years, my boss has been nagging that she  wants the glass doors removed from the bathtub in the guest bathroom. I have resisted. I actually like the glass doors. But, in the end, I recognize my position in the pecking order, and succumbed.
This was only marginally a DIY plumbing project. There are three steps to this project. (That is, if we put aside procrastination, which is usually the default first step!) First, remove the doors. Second, remove the frame. Third, remove the caulk and patch up any holes. There are lots of tips (like this) and videos (like this) to provide advice on this kind of DIY plumbing project.
Removing the doors is tricky because they are very heavy glass and do not remove easily. I found that by loosening the top frame and lifting it up an inch, it was then possible to have the clearance needed to remove the doors from their runners. Given their weight, this might be best for two people to do.
The aluminum frame was held in place by three screws on each vertical side. These came out quickly. But what really holds the aluminum frame in place is caulk. And lots of it! In my case, it was silicone caulk, which is hard to remove. The challenge is to remove the silicone without damaging the tub or surround.
Good news though. I listed the removed bathtub doors, mounting rails and plumbing on Kijiji. Within two hours I had a response, and the old bathtub doors have found a good home. It probably helped that I listed them for free.
Removing Silicone Caulk – A Real DIY Plumbing Challenge
There are many web suggestions for removing silicone caulk. Most of them relate to caulk used for sealing tub edges. There are proprietary products that you can brush on the silicone seam to make it easier to remove.
The silicone strips used to hold the bathtub door frames in place are more difficult. The aluminum frames pulled off quite easily leaving the strips of silicone in place. Using a hair dryer, I warmed the silicone strips, and then used a small metal spatula (1″ putty knife) to scrape off most of the silicone. This left a thin strip of silicone on the tub lip and surround surface.
Next, I used a single-sided razor blade to carefully remove most of the remaining silicone without scratching the tub surface. I bought a package of five small razor blades the have a holder along one side, from Home Depot. I am sure these will come in handy again, perhaps in my next DIY plumbing project. (Back in my previous life, we used these single-sided blades for splicing edits on audio tape.)
Although I have removed maybe 99% of the silicone, there is still a noticeable layer remaining. I will try to remove this with either mineral spirits or some of the proprietary silicone remover. And, of course, elbow grease.
Finally I will patch up the screw holes. They are small and hardly noticeable. For now, I have just sealed them up with … more silicone!